| No. | Inspection Item | Inspection Method | View | Accuracy Check | |
| Tolerance(mm) | Measured Value(mm) | ||||
| G1 | Levelness Inspection | Place the precision level at 90° on the table surface, aligned with the column in the X or Z direction. Move the table forward and backward (positive T) or move the table left and right (negative T). Read and record the values; the measured data shall be taken as the inspection result. |  |
Accuracy Requirement: Dynamic levelness: 1.5 divisions (single table). | |
| Levelness Inspection | Place the precision level at 90° on the table surface, aligned with the column in the X or Z direction. Move the table left and right (positive T), or move the column forward and backward. Read the values in the reverse T direction; the measured data shall be taken as the inspection result. |  |
Dynamic levelness: 1.5 divisions (Dual tables) |
||
| G2 | Straightness of X-axis Linear Motion (in the XY Plane) | Place the granite straightedge at the center of the worktable. Mount the dial indicator on the spindle. Move the X-axis and record the readings; the measured data shall be taken as the inspection result. |
 |
0.02/500mm | |
| Straightness of Y-axis Linear Motion (in the XZ Plane) | Place the granite straightedge at the center of the worktable. Mount the dial indicator on the spindle. Move the Y-axis and record the readings; the measured data shall be taken as the inspection result. |
 |
0.02/500mm | ||
| Straightness of Z-axis Linear Motion (in the YZ Plane) | Place the marble straightedge in the center of the work area; Mount the dial indicator onto the spindle; move the Z-axis, and the measured reading serves as the inspection value. |  |
0.02/500mm | ||
| G3 | Table Rotation Accuracy | Mount the dial indicator on the spindle, positioning the needle at the bottom-right corner of the worktable surface to establish the 0° reference point. Rotate the worktable to 90°, 180°, and 270°, and record the readings; these measured values constitute the inspection data. The maximum face runout at any point across these four angles must not exceed 0.015 mm. |  |
0.015/500mm | |
| G4 | Radial runout of the Spindle Taper Bore a) Near the spindle nose b) At 300 mm from the spindle nose |
Mount the dial indicator on the spindle, positioning the needle at the bottom-right corner of the worktable surface to establish the 0° reference point. Rotate the worktable to 90°, 180°, and 270°, and record the readings; these measured values constitute the inspection data. The maximum face runout at any point across these four angles must not exceed 0.015 mm. |  |
(a)0.007mm (b)0.015mm |
|
| G5 | Parallelism between the spindle axis and the Z-axis motion: a) In the vertical YZ plane: b) In the horizontal ZX plane: |
Mount the dial indicator on the worktable. Position the probe on the end face of the test bar. Move the Z-axis and record the readings; the measured values are taken as the result (a). Reposition the probe on the side surface of the test bar. Move the Z-axis and record the readings; the measured values are taken as the result (b). |
 |
(a) 0.015/300mm (b) 0.015/300mm |
|
| G6 | 360Rotation Accuracy |  |
0.015 mm / 400 mm No low spo exceeding 1 division | ||
| G7 | Perpendicularity between the Spindle Axis and the X-axis Motion | Mount the dial indicator on the spindle. Move the X-axis and record the readings; the measured data shall be taken as the inspection result. |  |
0.015/500 | |
| G8 | Parallelism between the Table Surface and the Direction of X-axis Motion |  |
0.02MM | ||
| G9 | Periodic Axial Runout of the Spindle | Position the dial indicator so that it contacts surface *a*—the outer edge of the spindle's end face. While the spindle is rotating, determine the maximum difference in the indicator's readings; this constitutes the measured value. Next, position the indicator's probe to contact surface *b*—the outer circumference of the spindle. Rotate the spindle again and measure the maximum difference in readings; this constitutes the second measurement. |  |
0.005MM | |
| G10 | Parallelism between the Table Surface and the Direction of Z-axis Motion: |  |
0.015 mm / 400 mm No low spot exceeding 1 division | ||
| G11 | Flatness of the Table Surface | For a measurement length of 1000 mm, the tolerance is 0.018 mm; for every additional 1000 mm of worktable length, an additional tolerance of 0.005 mm is permitted. Local tolerance: over a 300 mm span, the measurement deviation is ≤ 0.02 mm. |  |
0.02MM | |
| G12 | End Face runout of the Table Working Surface |  |
0.02MM | ||
| G13 | Height Deviation of Interchangeable Tables | Mount the dial indicator onto the spindle; move the X-axis to take measurements, and record the resulting data as the inspection value. |  |
0.02MM | |
![]()
| Machine Tool Axis Positioning Accuracy and Repeatability Table Laser Measurement Results in Accordance with ISO 230-2:1997 |
||||||||
| Laser Interferometer Resolution(μm) X __Y__Z __ | ||||||||
| Inspector: | ||||||||
| Inspection Item | Actual Axis Measuring Travel (mm) | Axis Measuring Range (mm) | ||||||
| Code / Symbol | X | Y | Z | ≤500 | >500~ 800 | >800~125 0 | >1250~2000 | |
| Actual Measured Result (μm) | Tolerance (μm) | |||||||
| Bi-Directional Positioning Accuracy (A) | A | 15 | 20 | 25 | 30 | |||
| directional Positioning Accuracy (A↑ / A ↓) μm | A ↑ | 9 | 10 | 11 | 12 | |||
| A ↓ | ||||||||
| Directional Repeatability (R↑/R↓) | R ↑ | 6 | 8 | 9 | 10 | |||
| μm | R ↓ | |||||||
| Axis Reversal Value | B | 10 | 10 | 12 | 12 | |||
| Bi-directional Positioning System Deviation | E | 15 | 18 | 20 | 25 | |||
| Mean Bi-directional Position Deviation of the Axis | M | 10 | 12 | 15 | 20 | |||
| Note: The symbol ↑ indicates an approach in the positive direction, and ↓ indicates an approach in the negative direction. | ||||||||
| Remark: Depending on the machine model and data, higher accuracy requirements are subject to the manufacturing process. | ||||||||
|
Machine Tool Circularity Inspection Record According to GB/T17421.4 |
||||||
| Ball Bar Clearance(μm)X__Y__Z__ | ||||||
| Box Way:__ According to Process Requirements | ||||||
| XY Plane – 360° Test, Radius 150 mm | ||||||
| Error | amplitude | Tolerance (mm) | ||||
| Before Adjustment | After Adjustment | |||||
| X Backlash X-axis | 2 | |||||
| Y Backlash Y-axis | 2 | |||||
| X Reversal Overshoot X-axis | 2 | |||||
| Reversal Overshoot Y-axis | 2 | |||||
| Lateral Clearance X-axis | 2 | |||||
| Lateral Clearance Y-axis | 2 | |||||
| Cyclic Error X-axis | ↑ | ↓ | ↑ | ↓ | ||
| Cyclic Error Y-axis | ↑ | ↓ | ↑ | ↓ | ||
| Servo Mismatch | 0.012ms | |||||
| Squareness | 50 | |||||
| Straightness – X axis | ||||||
| Straightness – Y axis | ||||||
| Scale Mismatch | ||||||
| Calculated Feedrate Error | 0.04 | |||||
| Position Tolerance | ||||||
| Best-fit Radius | ||||||
| Circularity | Box way < 10 / Linear guideway 15 | |||||
|
|
||||||
| Error | amplitude | Tolerance (mm) | ||||
| Before Adjustment | After Adjustment | |||||
| Backlash X-axis | 2 | |||||
| Backlash Y-axis | 2 | |||||
| X Reversal Overshoot X-axis | 2 | |||||
| Reversal Overshoot Y-axis | 2 | |||||
| Lateral Clearance X-axis | 2 | |||||
| Lateral Clearance Y-axis | 2 | |||||
| Cyclic Error X-axis | ↑ | ↓ | ↑ | ↓ | ||
| Cyclic Error Y-axis | ↑ | ↓ | ↑ | ↓ | ||
| Servo Mismatch | 0.012ms | |||||
| Squareness | 50 | |||||
| Straightness – X axis | ||||||
| Straightness – Y axis | ||||||
| Scale Mismatch | ||||||
| Calculated Feedrate Error | 0.04 | |||||
| Position Tolerance | ||||||
| Best-fit Radius | ||||||
| Circularity | Box way < 10 / Linear guideway 15 | |||||
| Warranty coverage applies to any abnormalities noted above. Signature, Date: |
||||||
![]()
| Horizontal Machining Center Assembly Inspection Record – V1.0 | ||||||||||
| Machine Mode:____Serial No.:____ : Document No.: WJJYB2025072301 |
||||||||||
| No. | Sheet Metal Installation | Production Self-Inspection | Quality Inspection | Remarks | ||||||
| 1 | Sheet metal support frames and brackets are aligned flush with the castings; sheet metal fits flat. | OK□ | NG□ | OK□ | NG□ | |||||
| 2 | Sealant applied on castings is full and smooth, without breaks; sheet metal installation is flat. Fig. 1 | OK□ | NG□ | OK□ | NG□ | |||||
| 3 | Sealant was applied to the casting at the H630 Z-axis motor location. (Fig. 3) | OK□ | NG□ | OK□ | NG□ | |||||
| 4 | Sealant at sheet metal joints is neat and even, without protrusions; excess sealant is cleaned off. (Fig. 2) | OK□ | NG□ | OK□ | NG□ | |||||
| 5 | Electrical cabinet bracket M12 bolts are installed with washers correctly, tightened and torque-marked. | OK□ | NG□ | OK□ | NG□ | |||||
| 6 | Electrical cabinet support frame is properly positioned; all bolts are installed. (Fig. 11) | OK□ | NG□ | OK□ | NG□ | |||||
| 7 | All integrated (3-in-1) bolts are fully installed and tightened; sealant is cleaned and neat. | OK□ | NG□ | OK□ | NG□ | |||||
| 8 | Installed sheet metal is aligned evenly, without bulging or misalignment. | OK□ | NG□ | OK□ | NG□ | |||||
| 9 | Front green decorative sheet metal screws are sealed neatly; screws are tightened and flush. | OK□ | NG□ | OK□ | NG□ | |||||
| 10 | Peripheral panels are fully installed; ____ screws installed completely. | OK□ | NG□ | OK□ | NG□ | |||||
| 11 | Grilles are fully installed (____ pieces); doors operate without interference; locks are fully installed. | OK□ | NG□ | OK□ | NG□ | |||||
| 12 | Check whether the water tank sheet metal matches the machine properly and is aligned flush. | OK□ | NG□ | OK□ | NG□ | |||||
| 13 | Front door sliders and rollers (3-in-1 assembly): screws tightened and torque-marked. | OK□ | NG□ | OK□ | NG□ | |||||
| 14 | Upper and lower guide rails on the front door side: cylindrical screws tightened and torque-marked; sliders tightened and torque-marked. | OK□ | NG□ | OK□ | NG□ | |||||
| 15 | Rear anti-collision blocks on the front door side (3-in-1 assembly): screws tightened and torque-marked. | OK□ | NG□ | OK□ | NG□ | |||||
| 16 | H800 triangular sheet metal on the front door (3-in-1 assembly): screws tightened and torque-marked. | OK□ | NG□ | OK□ | NG□ | |||||
| 17 | Front door opens and closes smoothly without interference, properly aligned and flush. | OK□ | NG□ | OK□ | NG□ | |||||
| 18 | Anti-drop hook on the front door side adjusted with a 1–2 mm clearance; movement without interference. | OK□ | NG□ | OK□ | NG□ | |||||
| 19 | Door handle free of scratches, burrs, and paint peeling; screws sealed; no sharp edges. | OK□ | NG□ | OK□ | NG□ | |||||
| 20 | Door glass free of scratches and cracks; glass sealant and retaining strips properly installed; screws tightened. | OK□ | NG□ | OK□ | NG□ | |||||
| 21 | Door and window glass sealed with sealant; protective film removed; locks sealed. | OK□ | NG□ | OK□ | NG□ | |||||
| 22 | Door bumpers and anti-collision blocks are installed with rubber pads. | OK□ | NG□ | OK□ | NG□ | |||||
| 23 | System cabinet installed without interference and properly positioned. | OK□ | NG□ | OK□ | NG□ | |||||
| 24 | System cabinet rotation smooth, without abnormal noise or interference. | OK□ | NG□ | OK□ | NG□ | |||||
| 25 | The system cabinet doors operate without interference; the locks are undamaged and free of paint chips. | OK□ | NG□ | OK□ | NG□ | |||||
| 26 | Electrical cabinet doors open and close without interference; doors aligned flush; sealing strips applied. | OK□ | NG□ | OK□ | NG□ | |||||
| 27 | Electrical cabinet door latches operate normally, without interference. | OK□ | NG□ | OK□ | NG□ | |||||
| 28 | The top of the electrical cabinet is sealed, free of gaps, holes, etc. | OK□ | NG□ | OK□ | NG□ | |||||
| 29 | One Ø28 mm cable entry hole is provided on the electrical cabinet. | OK□ | NG□ | OK□ | NG□ | |||||
| 30 | The main switch bracket on the electrical cabinet was installed without interference; the screws were tightened. | OK□ | NG□ | OK□ | NG□ | |||||
| 31 | Water Gun Mount Installation | OK□ | NG□ | OK□ | NG□ | |||||
| 32 | Cable duct covers installed flush, without gaps. | OK□ | NG□ | OK□ | NG□ | |||||
| 33 | Light cable duct covers installed. | OK□ | NG□ | OK□ | NG□ | |||||
| 34 | Rotary door glass fully installed; retaining strip screws tightened. | OK□ | NG□ | OK□ | NG□ | |||||
| 35 | Rotary door glass fully installed; retaining strip screws tightened. | OK□ | NG□ | OK□ | NG□ | |||||
| 36 | Rotary door sheet metal is fully installed, without interference. | OK□ | NG□ | OK□ | NG□ | |||||
| 37 | All sheet metal parts and components are free of damage, deformation, or paint peeling; clean and tidy. | OK□ | NG□ | OK□ | NG□ | |||||
| 38 | Ladder guardrails installed; support brackets secured with external hex bolts. | OK□ | NG□ | OK□ | NG□ | |||||
| 39 | Front door threshold installed flush; all screws installed completely. | OK□ | NG□ | OK□ | NG□ | |||||
| 40 | Chip conveyor free of rust and paint peeling; sufficient length; rollers fully installed. | OK□ | NG□ | OK□ | NG□ | |||||
| 41 | Drain outlet fitted with sheet metal and sealing strips; front drip trays installed for dual stations. | OK□ | NG□ | OK□ | NG□ | |||||
| 42 | Coolant tank sheet metal covers installed; clamping plates complete; support brackets installed and aligned flush. | OK□ | NG□ | OK□ | NG□ | |||||
| Signature, Date | Production: | Quality Control: | ||||||||
| No. | Pneumatic, Water/Hydraulic Circuits | Production Self-Inspection | QC Verification | Remarks | |||
| 1 | Receiver tank fasteners tightened with no air leakage; fittings leak-free; air piping bottom inlet/top outlet; ball valve securely installed. | OK□ | NG□ | OK□ | NG□ | ||
| 2 | Solenoid valves leak-free; correctly installed and aligned; screws tightened. | OK□ | NG□ | OK□ | NG□ | ||
| 3 | All pneumatic tees and couplings are leak-free; hoses are undamaged. | OK□ | NG□ | OK□ | NG□ | ||
| 4 | Air filters correctly installed; fasteners tightened; flow direction consistent. | OK□ | NG□ | OK□ | NG□ | ||
| 5 | All air filter connections are leak-free. | OK□ | NG□ | OK□ | NG□ | ||
| 6 | Airtight tubing properly installed; all regulating valves aligned and screws tightened. | OK□ | NG□ | OK□ | NG□ | ||
| 7 | All pipelines are clearly labeled with correct and consistent orientation. | OK□ | NG□ | OK□ | NG□ | ||
| 8 | All components free of damage, cracks, or surface scratches. | OK□ | NG□ | OK□ | NG□ | ||
| 9 | Pneumatic and oil hoses are free of kinks or cracks. | OK□ | NG□ | OK□ | NG□ | ||
| 10 | Tool magazine pneumatic hose couplings are properly installed. | OK□ | NG□ | OK□ | NG□ | ||
| 11 | Manifold fittings leak-free; coolant gun fitted with ball valve; fittings tightened with PTFE tape applied. | OK□ | NG□ | OK□ | NG□ | ||
| 12 | Rear flushing water fittings aligned and complete; hoses of sufficient length, secured; retaining clips tightened. | OK□ | NG□ | OK□ | NG□ | ||
| 13 | 一Cutting pump, rear flushing pump, and through-spindle coolant pump fully installed with consistent orientation. | OK□ | NG□ | OK□ | NG□ | ||
| 14 | Water distribution block secured; fittings tightened; no paint peeling; brass fittings tightened. | OK□ | NG□ | OK□ | NG□ | ||
| 15 | Ring-type oil hose fittings at the spindle tightened; fittings oriented upward; sufficient quantity with uniform hose length. | OK□ | NG□ | OK□ | NG□ | ||
| 16 | Hoses for the water pump, rear flushing water, and through-spindle coolant are of sufficient length, free of kinks or interference; fittings tightened with PTFE tape applied; retaining clips tightened. | OK□ | NG□ | OK□ | NG□ | ||
| 17 | Rotary table oil hose fittings tightened with PTFE tape applied; high-pressure hoses secured without interference. | OK□ | NG□ | OK□ | NG□ | ||
| 18 | Rotary table oil hoses are routed through the drag chain without crossing, neatly arranged, and securely fastened. | OK□ | NG□ | OK□ | NG□ | ||
| 19 | Rotary table air hoses are properly routed without interference or folding; neatly arranged and protected with steel wire braided hoses. | OK□ | NG□ | OK□ | NG□ | ||
| 20 | All lubricator oil hoses are protected with sleeves; couplings are tightened. | OK□ | NG□ | OK□ | NG□ | ||
| 21 | Lubricator installed flush; fittings installed with valve cores and tightened. | OK□ | NG□ | OK□ | NG□ | ||
| 22 | Thin oil lubrication unit hoses and fittings installed properly; fittings tightened and aligned flush. | OK□ | NG□ | OK□ | NG□ | ||
| 23 | Tee fittings tightened; thin-oil lubricator fittings and hoses properly connected; hoses not excessively long or bent. | OK□ | NG□ | OK□ | NG□ | ||
| 24 | Oil drain fittings installed and tightened; hoses not overtightened. | OK□ | NG□ | OK□ | NG□ | ||
| 25 | Pneumatic and oil hoses are routed through the drag chain without interference or crossing, protected with sleeves, and separated by partition plates. | OK□ | NG□ | OK□ | NG□ | ||
| 26 | Drag chain installed at the level; screws tightened; covers fully installed with consistent orientation. | OK□ | NG□ | OK□ | NG□ | ||
| 27 | Drag chain partitions installed at intervals (one partition every two sections); anti-scratch plates installed at the head and tail of the drag chain. | OK□ | NG□ | OK□ | NG□ | ||
| 28 | Rear sheet metal fittings tightened with PTFE tape applied and properly labeled. | OK□ | NG□ | OK□ | NG□ | ||
| 29 | Piping for the chip conveyor, through-spindle coolant, and oil chiller are neatly routed, of sufficient length, and properly labeled. | OK□ | NG□ | OK□ | NG□ | ||
| 30 | Through-spindle coolant return hose installed with sufficient length; retaining clips tightened. | OK□ | NG□ | OK□ | NG□ | ||
| 31 | Oil–water separator on the coolant tank is properly installed; screws tightened; oil collection box accessories return flow normal. | OK□ | NG□ | OK□ | NG□ | ||
| 32 | Oil mist collector mounting nuts tightened; accessories fully installed. | OK□ | NG□ | OK□ | NG□ | ||
| 33 | Rotary joint accuracy checked with a dial indicator (____); tightened with a 45 N·m torque wrench and torque-marked. | OK□ | NG□ | OK□ | NG□ | ||
| 34 | Rotary joint fittings installed and connected to Ø8 tubing. | OK□ | NG□ | OK□ | NG□ | ||
| 35 | Rotary joint moving valve properly installed; aligned flush with the rotary joint oil hose. | OK□ | NG□ | OK□ | NG□ | ||
| 36 | Spindle gearbox fittings tightened with PTFE tape applied; hoses properly connected and tightened. | OK□ | NG□ | OK□ | NG□ | ||
| 37 | Spindle tool unclamping cylinder air-blow hose properly connected. | OK□ | NG□ | OK□ | NG□ | ||
| 38 | The oil cooler has a gearless 5# unit and a gearbox 32# unit, which is 80% full. | OK□ | NG□ | OK□ | NG□ | ||
| Signature, Date | Production: | Quality Control: | |||||
![]()
| No. | Electrical Control Interconnection | Production Self-Inspection | QC Verification | Remark | |||
| 1 | System and panels fully installed; screws tightened. | OK□ | NG□ | OK□ | NG□ | ||
| 2 | System and panel grounding wires are properly connected. | OK□ | NG□ | OK□ | NG□ | ||
| 3 | All connector screws tightened; ribbon cable connectors securely latched. | OK□ | NG□ | OK□ | NG□ | ||
| 4 | Handwheel connector tightened; wiring properly connected; bracket installed flush and tightened. | OK□ | NG□ | OK□ | NG□ | ||
| 5 | All system and panel terminals tightened with no looseness. | OK□ | NG□ | OK□ | NG□ | ||
| 6 | Drive bracket mounting screws tightened; threads intact (no stripping). | OK□ | NG□ | OK□ | NG□ | ||
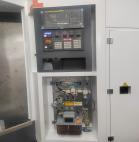
| 7 | Screws for drives, I/O modules, 4th-axis drive, and inverter tightened; grounding properly connected. | OK□ | NG□ | OK□ | NG□ | ||
| 8 | Electrical cabinet base plate screws and nuts tightened and secured. | OK□ | NG□ | OK□ | NG□ | ||
| 9 | Cable markers uniformity aligned; labeling correct. | OK□ | NG□ | OK□ | NG□ | ||
| 10 | All wire terminals are properly clamped and locked; no exposed copper. | OK□ | NG□ | OK□ | NG□ | ||
| 11 | Relays labeled correctly; labels properly aligned. | OK□ | NG□ | OK□ | NG□ | ||
| 12 | Drive bracket screws tightened; no thread stripping. | OK□ | NG□ | OK□ | NG□ | ||
| 13 | All components securely mounted, not tilted, with correct orientation. | OK□ | NG□ | OK□ | NG□ | ||
| 14 | Main switch and bracket free of interference; screws tightened; wiring properly connected. | OK□ | NG□ | OK□ | NG□ | ||
| 15 | Internal cabinet wiring is neatly arranged and properly routed (Fig. 12). | OK□ | NG□ | OK□ | NG□ | ||
| 16 | Motor cables and similar wiring passing through sheet metal holes are protected with corrugated conduit fittings. | OK□ | NG□ | OK□ | NG□ | ||
| 17 | All fittings installed with screws tightened and properly labeled. | OK□ | NG□ | OK□ | NG□ | ||
| 18 | All connectors secured with tightened screws; ribbon cable connectors firmly latched. | OK□ | NG□ | OK□ | NG□ | ||
| 19 | Air-conditioner heat exchanger wiring is properly connected; cable markers are correctly installed with no detachment. | OK□ | NG□ | OK□ | NG□ | ||
| 20 | Tool magazine terminal wiring properly connected; cable markers in place; cover does not pinch cables. | OK□ | NG□ | OK□ | NG□ | ||
| 21 | Three-axis motor power cables securely connected; brake cables properly connected; encoder bracket cables firmly clamped. | OK□ | NG□ | OK□ | NG□ | ||
| 22 | Spindle motor cables are properly connected and tightened; cable markers are in place; the cover does not pinch cables. | OK□ | NG□ | OK□ | NG□ | ||
| 23 | Hydraulic station connected to 380V power supply; wiring secure with no looseness; cable marks aligned and correct. | OK□ | NG□ | OK□ | NG□ | ||
| 24 | Through-spindle coolant power connected to 380V; wiring secure with no looseness; cable markers aligned and correct. | OK□ | NG□ | OK□ | NG□ | ||
| 25 | Transformer wiring screws tightened; 220V and 380V circuits separated; cable markers aligned; no loose wires; screws securely tightened. | OK□ | NG□ | OK□ | NG□ | ||
| 26 | Oil chiller wired to 220V; cable markers aligned; no looseness; screws tightened. | OK□ | NG□ | OK□ | NG□ | ||
| 27 | Lubrication unit power and signal cables correctly installed; oil-pressure cable markers in place; terminals secure; cover tightened without pinching cables. | OK□ | NG□ | OK□ | NG□ | ||
| 28 | One Ø28 cable entry hole is provided on the electrical cabinet. | OK□ | NG□ | OK□ | NG□ | ||
| 29 | One grounding wire is properly connected for each electrical cabinet door. | OK□ | NG□ | OK□ | NG□ | ||
| 30 | Tool magazine button cover intact; all screws installed and tightened. | OK□ | NG□ | OK□ | NG□ | ||
| 31 | Foot pedal cable length sufficient to reach the spindle side; connectors properly labeled. | OK□ | NG□ | OK□ | NG□ | ||
| 32 | Spindle positioning switch wiring properly connected; lock nuts tightened; clearance set to 1.5–3 mm. | OK□ | NG□ | OK□ | NG□ | ||
| 33 | Spindle motor proximity switch securely fastened with a 1.5–3 mm clearance. | OK□ | NG□ | OK□ | NG□ | ||
| 34 | Oil chiller flow meter wiring properly connected; no looseness; screws tightened. | OK□ | NG□ | OK□ | NG□ | ||
| 35 | Safety door wiring properly connected; bracket installed flush; switch operates without interference. | OK□ | NG□ | OK□ | NG□ | ||
| 36 | Tool magazine door proximity switch wiring properly connected; lock nuts tightened; clearance set to 1.5–3 mm. | OK□ | NG□ | OK□ | NG□ | ||
| 37 | Lamp connectors must face downward; wiring must be properly connected and tightened; corrugated conduit must be installed; and screws must be tightened. | OK□ | NG□ | OK□ | NG□ | ||
| 38 | All solenoid valve wiring for air filters is properly connected; cable ducts are labeled with consistent orientation. | OK□ | NG□ | OK□ | NG□ | ||
| 39 | Oil mist collector wiring is properly connected and protected with corrugated conduit. | OK□ | NG□ | OK□ | NG□ | ||
| 40 | Oil-water separator wiring properly connected; connectors labeled. | OK□ | NG□ | OK□ | NG□ | ||
| 41 | Tool setter wiring is properly connected and protected with cable conduit. | OK□ | NG□ | OK□ | NG□ | ||
| 42 | Water pump wiring properly connected; cable length sufficient; cables properly labeled. | OK□ | NG□ | OK□ | NG□ | ||
| Signature Date: | Production: | Quality Control: | |||||
![]()
| NO. | Coupling Process Inspection | Coupling Process Inspection | Quality Inspection | Remarks | |||
| 1 | Inspect lubricator fittings, tee fittings, and connectors for oil leakage; check lubricator hoses for kinks, wear, or damage; soft hoses properly installed (Fig. 9). | OK□ | NG□ | OK□ | NG□ | ||
| 2 | Lubricator alarm functions normally; set Fagor parameter K4.5 = 1 (oil level); K8.3 = 1 (lubrication); Mitsubishi parameters 17005 / 16439 / 16456. | OK□ | NG□ | OK□ | NG□ | ||
| 3 | Lubricator oil type 68# anti-wear hydraulic oil; no water ingress or foreign matter. | OK□ | NG□ | OK□ | NG□ | ||
| 4 | Lubricator oil level marking correct; visually confirm oil discharge; manual lubrication test ×5 cycles normal; automatic lubrication operates normally. | OK□ | NG□ | OK□ | NG□ | ||
| 5 | Oil discharge normal; injector sprays correctly; oil returns smoothly; fittings leak-free and tightened. | OK□ | NG□ | OK□ | NG□ | ||
| 6 | 3-axis motor installed; heater pad screws tightened; wiring neat and properly routed. | OK□ | NG□ | OK□ | NG□ | ||
| 7 | 3-axis motor wiring terminals tightened; encoder cable secured; bracket firmly mounted. | OK□ | NG□ | OK□ | NG□ | ||
| 8 | Coupling installed securely; wiring routed neatly; both sides aligned and level. | OK□ | NG□ | OK□ | NG□ | ||
| 9 | Coupling cover installed; screws not over-length; no interference. | OK□ | NG□ | OK□ | NG□ | ||
| 10 | Inspect the lubrication manifold fittings, linear guide covers, and accessories completely. | OK□ | NG□ | OK□ | NG□ | ||
| 11 | Drag chain routed correctly; cables secured; no abrasion or interference. | OK□ | NG□ | OK□ | NG□ | ||
| Signature / Date: | Production: | Quality Control: | |||||
![]()
| No. | Guard Installation | Production Self-Check | Quality Inspection | Remarks | |||
| 1 | Guard brackets installed level; screws tightened. | OK□ | NG□ | OK□ | NG□ | ||
| 2 | Check linear guides, lead screws, and slide blocks for loose screws; no hardened oil residue on guides or screws; cleanliness acceptable. | OK□ | NG□ | OK□ | NG□ | ||
| 3 | Rotary table wiring properly routed; no rubbing or interference. | OK□ | NG□ | OK□ | NG□ | ||
| 4 | Check that the three-axis guard skirt is properly installed and secured. | OK□ | NG□ | OK□ | NG□ | ||
| 5 | MPG X, Y, Z, 4th and 5th axes; move the guard in positions X1, X10, X100, and check for any abnormal noise or behavior. | OK□ | NG□ | OK□ | NG□ | ||
| 6 | Manually jog X, Y, Z, 4th, and 5th lead screws; move the guard at 25% / 50% / 100% speed and check for abnormal noise. | OK□ | NG□ | OK□ | NG□ | ||
| 7 | Check whether guard installation causes interference; verify jogging and collision noise levels; ensure no excessive friction. | OK□ | NG□ | OK□ | NG□ | ||
| 8 | Guard screws tightened and marked; check guard appearance for damage or scratches. | OK□ | NG□ | OK□ | NG□ | ||
| 9 | Inside the guard, check that drag chains and pipes are properly routed; no interference, crossing, or hose sleeve damage. | OK□ | NG□ | OK□ | NG□ | ||
| 10 | Install the guard X/Z-axis connecting plates. | OK□ | NG□ | OK□ | NG□ | ||
| 11 | Ensure no interference between the guard and the Z-axis motor cover; install protective hose sleeves in front of the H500Z guard. | OK□ | NG□ | OK□ | NG□ | ||
| 12 | For the H630 casting drag chain, check that the white sheet metal inside the X-axis cable routing hole is installed, and that fastening screws are tightened and secured. | OK□ | NG□ | OK□ | NG□ | ||
| Signature / Date: | Production: | Quality Control: | |||||
![]()
| No. | Tool Magazine Installation | Production Self-Check | Quality Inspection | Remarks | |||
| 1 | Contact surfaces between the tool magazine support and the casting are clean; no rust or damage. | OK□ | NG□ | OK□ | NG□ | ||
| 2 | Tool magazine support feet installed; anchor bolts installed; leveling completed; positioning keys installed correctly. | OK□ | NG□ | OK□ | NG□ | ||
| 3 | Tool magazine support fixing bolts locked; reinforcement shims tightened; wiring completed. | OK□ | NG□ | OK□ | NG□ | ||
| 4 | Positioning keys installed; adjustment block installation bolts fitted with lock nuts and tightened. | OK□ | NG□ | OK□ | NG□ | ||
| 5 | Tool magazine supports locating pins installed correctly and not protruding. | OK□ | NG□ | OK□ | NG□ | ||
| 6 | Check whether the tool magazine's appearance has any deformation or paint peeling; verify that the tool magazine ID plate/nameplate is complete. | OK□ | NG□ | OK□ | NG□ | ||
| 7 | Check whether the tool magazine's appearance has any deformation or paint peeling; verify that the tool magazine ID plate/nameplate is complete. | OK□ | NG□ | OK□ | NG□ | ||
| 8 | Install the tool magazine cable box cover and the tool magazine protective cover. | OK□ | NG□ | OK□ | NG□ | ||
| No. | Tool Magazine Disassembly | Production | Quality Inspection | Remark | |||
| 1 | Remove the tool magazine fixing screws and locating keys; keep all bolts and fasteners properly stored in sealed bags. | OK□ | NG□ | OK□ | NG□ | ||
| 2 | Tighten the tool magazine bracket screws and secure the wiring properly. | OK□ | NG□ | OK□ | NG□ | ||
| 3 | The tool magazine cover shall be removed only when required. | OK□ | NG□ | OK□ | NG□ | ||
| 4 | Install the tool magazine cable box cover and the tool magazine protective cover. | OK□ | NG□ | OK□ | NG□ | ||
| Signature / Date: | Production: | Quality Control: | |||||
![]()
| No. | Parameters, functions | Production Self-Check | Quality Inspection | Remark | |||
| 1 | System time (Beijing Time) is correct; system password set correctly. | OK□ | NG□ | OK□ | NG□ | ||
| 2 | System screen powers on normally; no dead pixels; no alarms. | OK□ | NG□ | OK□ | NG□ | ||
| 3 | Spindle high/low gear shifting is smooth; no abnormality; normal noise. | OK□ | NG□ | OK□ | NG□ | ||
| 4 | Fanuc parameters check: 4028-0 / 4029-100 / 4549-1 | OK□ | NG□ | OK□ | NG□ | ||
| 5 | System and panel corresponding functions operate normally. | OK□ | NG□ | OK□ | NG□ | ||
| 6 | Secondary development interface; boot screen displays Yangsen LOGO. | OK□ | NG□ | OK□ | NG□ | ||
| 7 | Handwheel movement correctly reflects axis position; axis limits are effective (alarm displayed in system); axis directions are correct. | OK□ | NG□ | OK□ | NG□ | ||
| 8 | Work light switch functions normally; brightness is normal; light cable is routed downward. | OK□ | NG□ | OK□ | NG□ | ||
| 9 | Spindle vibration data and dynamic balance data were recorded clearly. | OK□ | NG□ | OK□ | NG□ | ||
| 10 | Spindle vibration data and dynamic balance data were recorded clearly. | OK□ | NG□ | OK□ | NG□ | ||
| 11 | Mitsubishi PLC switch; axis specifications; FNK K parameters; Siemens. | OK□ | NG□ | OK□ | NG□ | ||
| 12 | Fanuc hydraulic system parameters: K8.3-1, oil level K4.5-1, timers T02=25000 / T0012=20000 / TC004=1500; Mitsubishi 17005=15000 / 16439=200 / 16456=150; Siemens 14510 (interval 25 min) (Oil injection 25) (Oil discharge 22). | OK□ | NG□ | OK□ | NG□ | ||
| 13 | Press Emergency Stop; Y-axis has no drop; data recorded:______. | OK□ | NG□ | OK□ | NG□ | ||
| 14 | Three-axis lead screw pitch values: X Y Z B C | OK□ | NG□ | OK□ | NG□ | ||
| 15 | Three-axis speed parameters: X Y Z B C | OK□ | NG□ | OK□ | NG□ | ||
| 16 | Three-axis travel direction : X+ / X- , Y+ / Y- , Z+ / Z- , B axis , C axis verified. | OK□ | NG□ | OK□ | NG□ | ||
| 17 | Axis load direction confirmation: X+ / X- / Y+ / Y- / Z+ / Z- / B / C | OK□ | NG□ | OK□ | NG□ | ||
| 18 | Axis encoder parameters: X ___ Y ___ Z ___ B ___ C ___. | OK□ | NG□ | OK□ | NG□ | ||
| 19 | Spindle encoder code / parameters ___ spindle speed ___ rpm |
OK□ | NG□ | OK□ | NG□ | ||
| 20 | Collision protection enabled: Mitsubishi 6451-0 bit; FNK collision protection enabled twice. | OK□ | NG□ | OK□ | NG□ | ||
| 21 | Axis X extension vibration test at 0 mm / 150 mm / 300 mm, data recorded. | OK□ | NG□ | OK□ | NG□ | ||
| 22 | Tool test using BBT tool holder: Dial indicator BT50 spindle 0.9–1.1 mm, BT40 spindle 0.7–0.8 mm. | OK□ | NG□ | OK□ | NG□ | ||
| 23 | Front buttons, emergency stop, start, pause, rotary table, tool magazine forward/reverse; emergency stop is effective. | OK□ | NG□ | OK□ | NG□ | ||
| 24 | Indicator lights: front panel red stop light, yellow standby light, green operation light — status correct and consistent. | OK□ | NG□ | OK□ | NG□ | ||
| 25 | All machine axes manual jog and automatic homing operate correctly; directions are correct; Z-axis returns to home first. | OK□ | NG□ | OK□ | NG□ | ||
| 26 | No oil leakage at the spindle; hose clamps and cable ties securely fastened. | OK□ | NG□ | OK□ | NG□ | ||
| 27 | Tool setter horizontal alignment checked(___μm); air blow to tool setter functioning normally. | OK□ | NG□ | OK□ | NG□ | ||
| 28 | Tool breakage detection tested; probe needle dial indicator check; ring test performed; video recorded. | OK□ | NG□ | OK□ | NG□ | ||
| 29 | Tool setter stroke protection is enabled; the alarm is triggered when the tool setter is pressed. | OK□ | NG□ | OK□ | NG□ | ||
| 30 | Tool setter M-code check: M36 (reference tool); Fanuc / Mitsubishi M66H1 verified. | OK□ | NG□ | OK□ | NG□ | ||
| 31 | Spindle air blow sealing; cutting air blow; tool unclamp air blow; tool setter air blow all functioning; air gun OK. | OK□ | NG□ | OK□ | NG□ | ||
| 32 | Input M30 automatic power-off Functions effective. | OK□ | NG□ | OK□ | NG□ | ||
| 33 | Spindle forward and reverse rotation test completed; spindle speed matches commanded input value. | OK□ | NG□ | OK□ | NG□ | ||
| 34 | Oil mist collector functions normally; exhaust direction upward. | OK□ | NG□ | OK□ | NG□ | ||
| 35 | Oil-water separator functions normally; oil pipes are installed neatly and correctly. | OK□ | NG□ | OK□ | NG□ | ||
| 36 | Air pressure detection verified; parameter X2.7 = 1; Mitsubishi PLC interface; Siemens Easu-Extend accessed. | OK□ | NG□ | OK□ | NG□ | ||
| 37 | Oil cooling detection verified; parameter K4.6 = 1; Mitsubishi PLC interface; Siemens Easu-Extend accessed. | OK□ | NG□ | OK□ | NG□ | ||
| 38 | Pneumatic sealing test passed; M68 / M69 tested; green indicator normal; no alarm; air pressure 0.6 MPa. | OK□ | NG□ | OK□ | NG□ | ||
| 39 | The front pneumatic valve functions tested and confirmed normal. | OK□ | NG□ | OK□ | NG□ | ||
| 40 | Safety door and interlock are effective; bracket bolts fitted with washers and tightened; door opens/closes without interference. | OK□ | NG□ | OK□ | NG□ | ||
| 41 | Parameter verification: Mitsubishi 1121, 1122; Fanuc 3202 #8, #9; macro program parameters set to 1. | OK□ | NG□ | OK□ | NG□ | ||
| 42 | Manual tool change Functions verified effective; signal indication positions are correct. | OK□ | NG□ | OK□ | NG□ | ||
| 43 | Foot pedal functions normally. | OK□ | NG□ | OK□ | NG□ | ||
| 44 | Manual jog for X / Y / Z / 4th / 5th axes: feed increments X25 / X50 / X100 effective. | OK□ | NG□ | OK□ | NG□ | ||
| 45 | Manual jog for X / Y / Z / 4th / 5th axes: feed increments X1 / X10 / X100 effective. | OK□ | NG□ | OK□ | NG□ | ||
| Signature / Date: | Production: | Quality Control: | |||||
![]()
| No. | Tool Clamping Cylinder &Spindle Motor | Production Self-Inspection | Quality Inspection | Remark | |||
| 1 | Adjust spindle belt tension properly; no belt slippage or friction interference. | OK□ | NG□ | OK□ | NG□ | ||
| 2 | Install and adjust spindle overload protection correctly; no interference; screws tightened; no spindle vibration during tool clamping. | OK□ | NG□ | OK□ | NG□ | ||
| 3 | Spindle motor and gearbox mounting bolts tightened with washers; wiring properly routed. | OK□ | NG□ | OK□ | NG□ | ||
| 4 | Spindle tool-clamping cylinder installed level; no vibration during tool clamping. | OK□ | NG□ | OK□ | NG□ | ||
| 5 | Spindle loosening sensor mounting nut tightened; wiring secured; gap 0.15–0.3 mm. | OK□ | NG□ | OK□ | NG□ | ||
| 6 | Rotary joints free of coolant and air leakage; spindle motor oil fittings tightened; no oil leakage. | OK□ | NG□ | OK□ | NG□ | ||
| 7 | Spindle home/limit switch mounting screws tightened; clearance 1.5–3 mm. | OK□ | NG□ | OK□ | NG□ | ||
| 8 | Spindle motor up/down movement is smooth; hoses and cables are free of interference. | OK□ | NG□ | OK□ | NG□ | ||
| Signature / Date: | Production: | Quality Control: | |||||
![]()
| No. | Tool Magazine Functions | Production Self-Inspection | Quality Inspection | Remark | |||
| 1 | Set tool change reference point Fanuc 1241__Mitsubishi 2038__Siemens 14514__ | OK□ | NG□ | OK□ | NG□ | ||
| 2 | Spindle orientation parameters Fanuc 4077__Mitsubishi 3108 Siemens 14514__ | OK□ | NG□ | OK□ | NG□ | ||
| 3 | Tool change operates normally; ATC alignment is correct; M6 tool change without abnormal noise; check for jamming or excessive clearance during tool loading/unloading. | OK□ | NG□ | OK□ | NG□ | ||
| 4 | Tool magazine returns to its home position Mitsubishi M90,Fanuc M92 , Siemens controlled by program logic; action correct. |
OK□ | NG□ | OK□ | NG□ | ||
| 5 | No abnormal movement when the tool magazine moves up/down. | OK□ | NG□ | OK□ | NG□ | ||
| 6 | Tool magazine disc forward/reverse rotation normal; no abnormal noise; sheet metal guards free of interference. | OK□ | NG□ | OK□ | NG□ | ||
| 7 | Tool magazine disc forward/reverse rotation normal and interference-free; tool pot (German ATC, 32 tools) operates correctly. | OK□ | NG□ | OK□ | NG□ | ||
| 8 | Tool magazine door switch functions correctly; slide block normal; proximity switch clearance 1.5–3 mm; screws tightened; M43 open / M44 close commands effective. | OK□ | NG□ | OK□ | NG□ | ||
| 9 | Tool magazine panel keys operate normally; the emergency stop is effective. | OK□ | NG□ | OK□ | NG□ | ||
| 10 | Tool magazine air lines and solenoid valves are free of leakage and interference. | OK□ | NG□ | OK□ | NG□ | ||
| 11 | Tool magazine idle time: ______ hours; no alarms; no dropped tools. | OK□ | NG□ | OK□ | NG□ | ||
| Signature / Date: | Production: | Quality Control: | |||||
![]()
| No. | Rotary Table | Production Self-Inspection | Quality Inspection | Remark | |||
| 1 | Manual rotation of the rotary table at 1%, 10%, 100% feed: no abnormal noise or vibration. | OK□ | NG□ | OK□ | NG□ | ||
| 2 | Manual rotation of the rotary table at 25%, 50%, 100% feed: no abnormal noise or vibration. | OK□ | NG□ | OK□ | NG□ | ||
| 3 | Rotary table clamping / unclamping: Mitsubishi M25 / M26, Fanuc M10 / M11, Siemens M10 / M11 operate correctly. | OK□ | NG□ | OK□ | NG□ | ||
| 4 | Rotary table backlash adjustment: handwheel and manual jog smooth; no abnormal noise under 15–30% load. | OK□ | NG□ | OK□ | NG□ | ||
| 5 | Worktable and 3-axis limit protection functions correctly. | OK□ | NG□ | OK□ | NG□ | ||
| 6 | Rotary table home position adjustment correct; no jumping during unclamping; worktable dial/scale normal. | OK□ | NG□ | OK□ | NG□ | ||
| 7 | Rotary table forward rotation normal; clockwise rotation correct. | OK□ | NG□ | OK□ | NG□ | ||
| 8 | Rotary table gear oil-filled (ISO 150) to approx. 80% level. | OK□ | NG□ | OK□ | NG□ | ||
| 9 | 630 1% rotary joint air line installed; pressure regulating valve set to 0.2 MPa. | OK□ | NG□ | OK□ | NG□ | ||
| 10 | Rotary table door interlock air blowing: no abnormal noise or interference; rotation to position correct; air pressure adjusted properly. | OK□ | NG□ | OK□ | NG□ | ||
| 11 | Rotary table M-codes: M31 / M32 verified. | OK□ | NG□ | OK□ | NG□ | ||
| Signature / Date: | Production: | Quality Control: | |||||
![]()
| No | Chiller · Oil Cooling unit · Hydraulic Station · Pneumatic Cylinder functions | Production Self-Inspection | Quality Inspection | Remark | |||
| 1 | Oil chiller displays normal; temperature control mode adjusted correctly; no blockage in spindle oil circuit. | OK□ | NG□ | OK□ | NG□ | ||
| 2 | Oil chiller pressure normal (5 kg); gearbox with 32-tooth gear, no 5th gear added; oil flow meter indicator normal. | OK□ | NG□ | OK□ | NG□ | ||
| 3 | High-pressure oil fittings and pipes secure; no damage; connections tightened. | OK□ | NG□ | OK□ | NG□ | ||
| 4 | Oil return flow normal; fittings inspected after disassembly and reinstallation. | OK□ | NG□ | OK□ | NG□ | ||
| 5 | Hydraulic station control quantity verified:______ fixtures confirmed. | OK□ | NG□ | OK□ | NG□ | ||
| 6 | The hydraulic station heat exchanger capacity matches the motor (Configuration X1 / X2). | OK□ | NG□ | OK□ | NG□ | ||
| 7 | Hydraulic station motor rotation correct; cooling fan operates normally; oil pipes and fittings free of leakage. | OK□ | NG□ | OK□ | NG□ | ||
| 8 | The hydraulic station's main pressure gauge reading approx. 55 Pa; all hydraulic pressure regulating valves adjusted according to component pressure requirements. | OK□ | NG□ | OK□ | NG□ | ||
| 9 | Pneumatic cylinder downstroke load unloading adjustment set to 15–25%; no sticking; approx. 15% residual load on the right side. | OK□ | NG□ | OK□ | NG□ | ||
| 10 | Pneumatic system exhaust pressure: ______ Pa; wiring secured; if below 50 Pa, replace filter element or replenish air supply. | OK□ | NG□ | OK□ | NG□ | ||
| 11 | Pneumatic hoses and fittings are free of air leakage; no air bubbles. | OK□ | NG□ | OK□ | NG□ | ||
| 12 | Upper and lower handwheels of pneumatic cylinder operate smoothly during manual movement; no abnormal noise. | OK□ | NG□ | OK□ | NG□ | ||
| 13 | Light curtain installed with left/right end alignment within 0.02 mm; full front stroke deviation within 0.1 mm; light curtain concentricity within 0.02 mm; internal gauge records completed. | OK□ | NG□ | OK□ | NG□ | ||
| 14 | Grating ruler measurement data recording X Axis______ Y Axis______ Z Axis ______ B Axis______ |
OK□ | NG□ | OK□ | NG□ | ||
| 15 | Adjust the grating ruler's air regulating valve to 0.2 MPa. | OK□ | NG□ | OK□ | NG□ | ||
| 16 | The grating ruler screws have pressure plates for tightening and marking, with the following torque values: M5/5N, M6/8N. No interference with the lines. | OK□ | NG□ | OK□ | NG□ | ||
| Signature / Date: | Production: | Quality Control: | |||||
![]()
| NO | Water Circuit · Through-Spindle Coolant · Chip Conveyor functions | Production Self-Inspection | Quality Inspection | Remark | ||
| 1 | Plate heat exchanger capacity verified; amperage matches water pump (X1 / 2 A). | OK□ | NG□ | OK□ | NG□ | |
| 2 | Cutting coolant pump, rear flushing pump, and through-spindle coolant pump forward/reverse rotation normal; no abnormal noise. | OK□ | NG□ | OK□ | NG□ | |
| 3 | Cutting coolant pipes, rear flushing pipes, and through-spindle coolant pipes properly clamped; no leakage; sheet metal and fittings free of leakage. | OK□ | NG□ | OK□ | NG□ | |
| 4 | Cutting coolant and rear flushing water flow is sufficient; pipelines are unobstructed. | OK□ | NG□ | OK□ | NG□ | |
| 5 | Through-spindle coolant pressure switch tightened; signal normal; float indicator functions normally. | OK□ | NG□ | OK□ | NG□ | |
| 6 | Through-spindle coolant pump rotation normal; pressure sufficient; flow rate normal. | OK□ | NG□ | OK□ | NG□ | |
| 7 | Through-spindle coolant station forward/reverse rotation normal; no abnormal noise; belt direction correct; pumping pressure and chip discharge normal. | OK□ | NG□ | OK□ | NG□ | |
| 8 | Through-spindle coolant system pressure test: pumping pressure ______ Pa. | OK□ | NG□ | OK□ | NG□ | |
| 9 | Through-spindle coolant station and chip conveyor heat load matches motor (X1 / X2). | OK□ | NG□ | OK□ | NG□ | |
| 10 | The chip conveyor and auger motor forward/reverse rotation functions correctly. | OK□ | NG□ | OK□ | NG□ | |
| Signature / Date: | Production: | Quality Control: | ||||
| No. | Machining Test | Production Self-Inspection | Quality Inspection | Remark | |||
| 1 | Perform test machining on a cast iron workpiece; inspect drilled hole threads; machined surface free of tool marks. | OK□ | NG□ | OK□ | NG□ | ||
| 2 | Verify that the M26.5 drill bit and M30 tapping tool can pass smoothly; no chatter or abnormal cutting. | OK□ | NG□ | OK□ | NG□ | ||
| Signature / Date: | Production: | Quality Control: | |||||
![]()
| Production Quality Issue Record File (Limited to 5 Items) | ||||
| Type Code (Enter Corresponding Letter): Production – A, Incoming Material – B, Engineering – C, Design – D, Others – E | ||||
| No. | Problem Description | Type | Production | QC |
| 1 | ||||
| 2 | ||||
| 3 | ||||
| 4 | ||||
| 5 | ||||
| 6 | ||||
| 7 | ||||
| 8 | ||||
| 9 | ||||
| 10 | ||||
| 11 | ||||
| 12 | ||||
| 13 | ||||
| 14 | ||||
| 15 | ||||
| Production Person / Date: QC Person/ Date: | ||||
 |
 |
 |
 |
 |
 |
| Fig. 1 Base | Fig. 2 Sheet Metal Joint | Fig. 3 Z-Axis Casting | Fig. 4 Controller Cabinetry | Fig. 5 Supporter | Fig. 6 Door |
 |
 |
 |
 |
 |
 |
| Fig. 7 Coupling | Fig. 8 Motor | Fig. 9 Oil Drain | Fig. 10 Tool Arm Sealing Plate | Fig. 11 Support Leg | Fig. 12 Cabinet |